HMS Sir John Moore
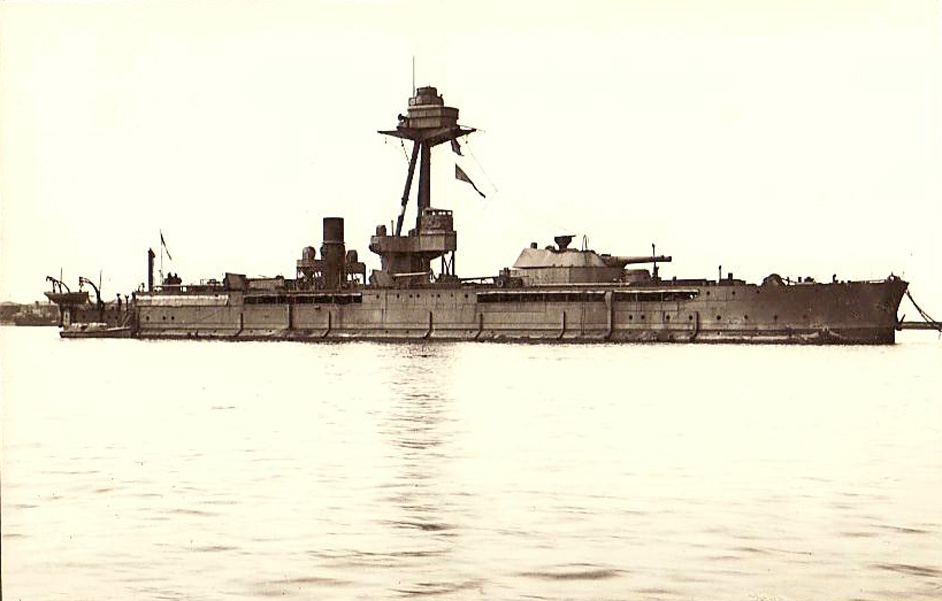
HMS Sir John Moore was one of the eight vessels of the Lord Clive-class monitors built for the Royal Navy during the First World War. These ships were conceived as a response to the pressing need for heavy shore bombardment vessels capable of supporting the army along the Belgian coast, where German forces had established fortified positions. Named after the distinguished British general Sir John Moore, the ship represented a specialist category of warship: shallow-draught, heavily armed, and designed almost exclusively for coastal operations rather than fleet engagements.
Laid down in 1915 by Harland & Wolff in Belfast, HMS Sir John Moore was part of a rapid construction programme. The Admiralty, facing stalemate on the Western Front and seeing the potential of naval firepower to break entrenched lines, sought ships that could carry battleship-sized guns close inshore. To save time and resources, the Lord Clive-class monitors were fitted with spare 12-inch twin turrets that had originally been built for the decommissioned Majestic-class pre-dreadnought battleships. This provided the new monitors with a formidable main armament without requiring the construction of entirely new weapons systems.
Displacing around 6,150 tons and measuring 335 feet in length, Sir John Moore was not a fast ship. With a maximum speed of about 7 knots, her propulsion was deliberately modest, as mobility was far less important than the ability to operate close to shore in shallow waters. Her broad beam and low draught made her stable gun platforms, ideally suited to bombard enemy fortifications from relatively close range. Protection was also limited, as they were never intended to fight in the line of battle against enemy warships.
In service, HMS Sir John Moore was primarily employed in the Dover Patrol, the naval force tasked with securing the English Channel and carrying out operations along the Belgian coast. The ship’s heavy guns were used to bombard German coastal batteries, railway junctions, and troop concentrations, particularly around Zeebrugge and Ostend. These bombardments were intended not only to damage German positions but also to tie down enemy resources and prevent them from reinforcing other fronts.
Life aboard the monitors was difficult. Their low speed and lack of seaworthiness made long voyages uncomfortable, and they were generally confined to coastal waters where they could be supplied and maintained. Nevertheless, their contribution was significant. The firepower of Sir John Moore and her sisters provided a morale boost to Allied troops and proved a persistent nuisance to the Germans, who were forced to deploy considerable artillery in counter-battery efforts.
After the Armistice in November 1918, the usefulness of the monitors rapidly declined. With no further need for coastal bombardment on such a scale, the vessels became surplus to requirements. HMS Sir John Moore was paid off in 1919 and sold for scrap in 1921, ending a brief but purposeful career.
Although she never engaged in a fleet battle or earned the fame of larger capital ships, HMS Sir John Moore symbolises the adaptability of the Royal Navy during the Great War. Purpose-built for a narrow but vital task, she exemplified how existing resources—obsolete guns and hurried construction—could be combined into effective, if temporary, weapons of war.


